The 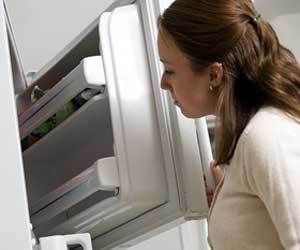 freezer tends to be one of the most neglected areas of the house. Because it stays so cold, it is not as quick to stink as the fridge can be. The problem with this is that when we do get around to cleaning it, it’s usually grossly overdue. Here’s how to take care of it without ruining your whole afternoon.
What You Will Need
Before you begin the cleaning process, you should get your supplies together. You don’t want to leave your freezer half done while you rush out to the grocery store. Here is what you’ll need:
- Rag or sponge
- Towel or paper towels
- Vinegar or other sanitizing cleaner
- Water
- Baking soda
- Old toothbrush
The Cleaning Process
1. Empty out the freezer
Obviously you cannot clean your freezer when it is full of food. So take this opportunity to remove everything and get rid of items that are really old or freezer burned or that you just don’t want to keep. If your freezer is a very large one, you may have to take things out in stages and use them up (start a few weeks before cleaning day) or transfer your food to a neighbor’s freezer. If there are only a few items, just stick them in a cooler, full of ice of course.
*If your freezer is attached to your fridge, you’ll need to empty the fridge compartment of quickly perishable items like milk and eggs since you will be unplugging it in the next step.
2. Defrost the freezer
(Many freezers nowadays do not get a buildup of frost. If yours is one of this type, go ahead and skip this step. All you need to do for a frost-free freezer is unplug it so that you aren’t cooling the room while you clean.)
After you’ve gotten the freezer emptied out, unplug it from the wall and open the lid or door. Depending on how much ice buildup there is, it could take anywhere from half an hour to several hours to defrost it. Don’t just abandon the freezer as it defrosts or you will have a lot of water to sop up from the bottom of the appliance. Instead, as soon as the ice becomes a little bit loose, use a knife or spatula to gently remove it from the freezer’s wall and dispose of it. For any water that does pool in the bottom, use a small bucket or dustpan to scoop it out or wipe it up with a towel. Be sure to wring the towel out in the sink.
*You can speed up the defrosting process by using a hair dryer to heat the ice or putting a bowl or two of boiling water in the freezer to warm it (you’ll want to close the lid or door in this case). However, be very careful that you do not burn or shock yourself. If you’re worried, do it the old fashioned way.
3. Wipe out the freezer
Now, with no food or ice in the way, you’re free to clean the sides and bottom of the freezer. The first thing you’ll want to do is get rid of any debris that is on the bottom: stray veggies, fries, etc. Just pick it out with your hands. (You can wear rubber or disposable gloves if you want).
Then use white vinegar or another cleaning product to wipe spills off of the sides and bottom of the freezer. An easy way to do this is to fill the sink or a large bowl with warm water and the solution you plan to use. Then simply wipe the freezer out with a rag or sponge. If your freezer has any shelves or drawers, take them out and scrub them in the sink to spare yourself a little bit of elbow grease.
Be sure to rinse off all of the cleaning solution with clean water to avoid leaving any stickiness or residue on the surface of the interior. Also, do not neglect to wash the door, both inside and outside, as well as the sides and top of the outside of the freezer. If you can pull the appliance out from the wall without too much hassle, this will probably help.
You may want to use an old toothbrush on the parts of the appliance that are hard to clean with the sponge or rag. This could include the seal as well as any corners. If there are any stubborn stains, you can dip the toothbrush in a solution of one part bleach and three parts water. This will also work to remove mildew.
4. Deodorize the freezer
Once the freezer is clean, you can remove any lingering odors by scrubbing the area down with a mixture of equal parts water and baking soda. You can avoid odors in the future by disposing of any spilled or freezer burned food on a weekly basis.
5. Dry the freezer
Use a dish towel or paper towel to dry the inside and outside of the freezer. Then replace the drawers and shelves if you removed them to wash them in the sink (after drying them too of course).
*At this point, you may want to coat the walls of your freezer with nonstick cooking spray (unflavored of course) or glycerin. This will make is so ice can’t stick to the walls. No more difficult defrosting!
Once the freezer is clean and dry, plug it back in. You want to do this before restocking the food so that you are sure everything is working properly.
6. Put the food back
When you’re putting the items back in the freezer, you can save yourself future headaches – and more frequent cleanings – by organizing them. For example, put all of the meats together, all of the vegetables together, and all of the boxes of appetizers together. Write an inventory list of what you’re storing so you will know what you have to use for meals in the future. It can also be helpful to date your list so you know how old things are and when they need to be gotten rid of.
If you don’t like simply stacking things in the freezer, considering buying freezer shelves. These are particularly helpful if you have a lot of smaller items, like cans of juice. Check your local house wares store.
And remember, if you just go the stacking route, make sure to put heavier items on the bottom. This can prevent spills from boxes and bags getting crushed and splitting open.






Thank you very much, this article was VERY helpful!
One very helpful tool is to use a dust pan to help get the water out of the bottom. I’ve used one for years and it dips and kind of squeegees at the same time to scoop up more than even a rag will. It can also be used to catch drips from your rag or paper towels.
I had no idea about the glycerin/cooking spray tip! I’ve read of people using plastic cling wrap on their refrigerator shelves for easy clean up as well. Thank you!
As you recommend the mixing of vinegar and baking powder with water, it would be helpful to indicate how much of each to mix with the water.
Any quick tips for keeping the crumbs off the bottom of the freezer? I’m so careful, but there are always crumbs!!! And they aren’t easy to access and clean!! I do have dividers in freezer, which helps some.
Gini,
Here’s an idea:
Put cookie racks in the bottom of the freezer and pile all of your freezer goods on top of the racks. Then, slide a placemat under each rack. In the future, you can then easily slide out the placemats to wipe up the crumbs without having to remove everything from the freezer.
Sorry, but this did not work. I had to let it sit for some time so the smell would go away.
Hey, there is dirty stinky water in my freezer that is stuck. I just dnt knw why this happened and how to remove it. Please help me am desperate.
Hi Iryn,
The best way to remove this is to unplug the freezer so that the dirty water can thaw and easily be cleaned away. Good luck!